Tinkering with Linux! Part Deux

Hey friends 👋
If you read my last blog post, you’ll know that I picked up a used Thinkpad on ebay to experiment with Linux. In that post I talked about my many experiences with Linux through the years and I recounted my distro-hopping adventure, as it relates to this new laptop.
By the end of that post, I had landed on using Bluefin, an immutable Linux distribution with a lot of thoughtful modern considerations. But I bought this Thinkpad because I wanted to tinker, and Bluefin presented too many limitations that I didn’t know how to overcome. Without a package manager of its own (it relies on a combination of Homebrew and flatpak for almost all software), you lose out on a lot of the more community-driven tools that can enable the kind of tinkering I was looking for.
We’ll talk about which distro I ended up on in a bit. But I want to start by talking about the specific tinkering I was trying to do.
First off, my Thinkpad has a fingerprint sensor. It’s well supported on Linux and on Gnome—the desktop environment which Bluefin comes with—there’s even a nice GUI in the settings menu for enrolling fingerprints. You simply go to Settings > System > Users > Fingerprint Login and you should be able to enroll multiple fingerprints for authentication.
However, before you can enroll fingerprints, on certain distros, you may have to install a set of packages called fprintd and/or libfprint in order for the fingerprint sensor to be recognized by the system. This was the case for me on Bluefin, and due to the limitations of Bluefin’s package options, there was seemingly no way to install these particular packages.
That wasn’t a deal breaker though.
The Vim Ultimatum
A few years ago on my Mac, when I began using the terminal-based text editor Neovim more and more, I fell in love with home row navigation. For those who are unaware, in the text editors Vim and Neovim, you do absolutely everything with the keyboard. This allows for a lot of unique key commands to move and manipulate your way through code and text; most of which is well beyond the scope of this post. The core functionality though is the use of the home row letters h, j, k, and l as substitutes for the arrow keys.
Vim Primer
h = left
j = down
k = up
l = right
This can take a bit of getting used to, but the key benefit is that you never need to move your hands out of the standard home row typing position, making it both more efficient and a lot more comfortable.
In fact, once I got familiar with this approach to cursor movement, I found it really annoying anytime I had to move using the keyboard’s actual directional keys, which require one to reposition the right hand down and to the right and then reset to the home row to begin typing again. The more often you alternate between moving and typing the more unpleasant this becomes.

 dev
devFortunately, I’m not the only person who loves using Vim navigation, so people have invented a number of ways to integrate this into your workflow. Code editors based on VS Code have extensions to add full Vim command support, and the incredible open-source alternative, Zed has unparalleled Vim support baked-in. There’s also browser extensions like Vimium that add pretty elaborate keyboard based navigation to any Chromium-based browser. And there are even niche web browsers like qutebrowser which have vim navigation as the default.
But none of that was enough for me. I wanted system wide Vim navigation. Nothing fancy. Just a way to enable Vim navigation when I want it, without affecting my ability to input text, or making my computer unusable by anyone other than me.
That’s where an app called Karabiner Elements comes in. This Mac-only app gives your computer superpowers. Through a relatively simple GUI, you can enable custom key-mappings from the most simple to the unimaginably elaborate. And what’s more, there’s a whole community of users sharing their templates, which they call rules.
There’s actually several predefined rules that do exactly what I wanted. Originally I used one called Use CAPS LOCK for vi navigation which was
great and I would recommend to most people.

But I’m a hyper key user. What does that mean? Well, as someone who uses a lot of professional software on Mac (Adobe Suite, Final Cut Pro, Affinity, Ableton), I need to make use of program-specific keyboard shortcuts all the time. So as a result, any custom keyboard shortcuts I create and use on my system need to be free of conflict in all other programs.
The easiest way to avoid conflict is to introduce a hyper key, which is a key that your computer recognizes as a cluster of other keys (most often every other modifier key combined). Since almost no software will make their users press all these keys at once to activate a feature (shortcuts are supposed to be fast under the fingers after all), a hyper key is almost universally ideal for system-wide shortcuts.
Where am I going with this? Well, most people—myself included—map their hyper key to Caps Lock, since that is a basically useless key located in one of the most ideal places on the keyboard: the home row. Karabiner Elements has a number of predefined rules that can enable this functionality, but I actually do it with Raycast, which also allows me to use the hyper key for all my different custom launcher shortcuts, like quickly opening apps, tiling windows, and moving through virtual desktops. Even Raycast’s clipboard manager is mapped to hyper + v, so it doesn’t cause any issue with the regular paste functionality.
Because of my remapping, my Caps Lock is not actually registering as Caps Lock, but as hyper ( ⌘ + ⌥ + ⌃ + ⇧ ), so I have to use a different Karabiner rule. I found one called Change hyper-(jikl) to (←↑↓→) keys which is close.

As you can see this one uses JIKL for that standard arrow keys layout. Kind of like the way gamers use WASD. If I had never used Vim, I would probably be using this approach, and if you are happy with that configuration, you could enable that and go on your merry way.
For me though, I needed to edit the configuration to work the Vim way. If you do want to do that, here is my entire edited config that you can copy and paste into Karabiner’s rule editor.
{
    "description": "Change hyper-(hjkl) to (←↑↓→) keys",
    "manipulators": [
        {
            "from": {
                "key_code": "h",
                "modifiers": {
                    "mandatory": ["left_command", "left_option", "left_control", "left_shift"],
                    "optional": ["any"]
                }
            },
            "to": [{ "key_code": "left_arrow" }],
            "type": "basic"
        },
        {
            "from": {
                "key_code": "k",
                "modifiers": {
                    "mandatory": ["left_command", "left_option", "left_control", "left_shift"],
                    "optional": ["any"]
                }
            },
            "to": [{ "key_code": "up_arrow" }],
            "type": "basic"
        },
        {
            "from": {
                "key_code": "j",
                "modifiers": {
                    "mandatory": ["left_command", "left_option", "left_control", "left_shift"],
                    "optional": ["any"]
                }
            },
            "to": [{ "key_code": "down_arrow" }],
            "type": "basic"
        },
        {
            "from": {
                "key_code": "l",
                "modifiers": {
                    "mandatory": ["left_command", "left_option", "left_control", "left_shift"],
                    "optional": ["any"]
                }
            },
            "to": [{ "key_code": "right_arrow" }],
            "type": "basic"
        }
    ]
}
Now, anywhere on my system, whenever I want to move left, right, up, or down, I’m simply moving my left pinky over to the Caps Lock key and using my home row fingers to move with ease.
Surely this must be easy on Linux
Spoiler alert: it wasn’t.
Well… that’s not entirely true either. But we’ll get there. Let’s start one month ago, around the time I released my post about installing Linux on my Thinkpad.
I was looking all over for a way to get the same functionality I had configured on my Mac to work on my new Linux setup. As I was on Bluefin, I decided to reach out to the project lead, Jorge Castro.

Unfortunately, though he was nice enough to respond, he didn’t have an answer for me.

I tried googling for an answer but everything I found was wrong. I turned to AI, and it dug up the same wrong content and fed it to me in instruction form. One thing did seem clear to me though: just like my issue with the fingerprint sensor, this would be much harder than it needed to be if I were to stay on an immutable system.
So I jumped ship from Bluefin over to Fedora, where I was easily able to get my fingerprint sensor working and likely would have had no issue getting my Vim hack working if I knew then what I know now.
Intermission
Around that time, I had a lot on the go so I put down my Thinkpad for a few weeks. I was too busy with other projects and I didn’t have any time to tinker. And, using my Mac, which is carefully configured how I want it, had me even less interested in pulling out the Thinkpad, knowing that I still couldn’t use my preferred workflow. I would come back to it when I was ready.
When I finally picked up the Laptop again I was in a different headspace entirely. Having watched a video by foci about installing CachyOS with Niri, I decided to try installing it again. Unfortunately I had a similar issue to last time where once it was all set up and should have worked, it just crashed and I couldn’t get it to boot again. Not sure why I’m so unlucky with this particular distro.
As I was still in the mood to experiment with tiling window managers, I installed PikaOS again and I played with their Niri version for a bit. It’s quite cool, but the more I use these tiling window managers, the more I missed Gnome. I know, I know, unpopular opinion or whatever.
It’s just that coming from Mac, Gnome feels like an upgrade to a familiar experience, while everything else feels so different it’s hard to relate. The workflow feels foreign, and the supposed efficiency gains feel superficial in the face of the time wasted on the immense learning curve. I imagine this is why Windows users gravitate towards KDE. It’s a more polished version of a familiar paradigm.
While I’m a Fedora stan, I’ve really been impressed with the ethos, community, and aesthetic of PikaOS, so, rather than going back to my faithful Fedora Workstation, I decided to use Pika’s Gnome version, and set to work getting it configured for daily use. First, I installed Bazaar to manage my flatpaks (it’s the best), then I set up my fingerprint sensor for authentication (easy peasy), and finally, I set out to slay the dragon that is this Vim navigation issue.
It took a lot of trial and error, and a little help from Brave’s Leo AI, but I finally got it figured out. Below is a little step by step for how to configure Caps Lock + hjkl to map to directional keys, so that if you want this functionality, you don’t need to waste any energy with AI or otherwise rip out all your hair trying to figure this out.
How to map Caps Lock + hjkl to Vim keys on Linux
Here’s a little step by step you can follow if you’re using any Linux distribution with Gnome.
- Install the
xremapGNOME Shell Extension. This is required. You can install it in Firefox at https://extensions.gnome.org/extension/5428/xremap/ or simply open the Gnome Extensions Manager, click Browse and search for it.
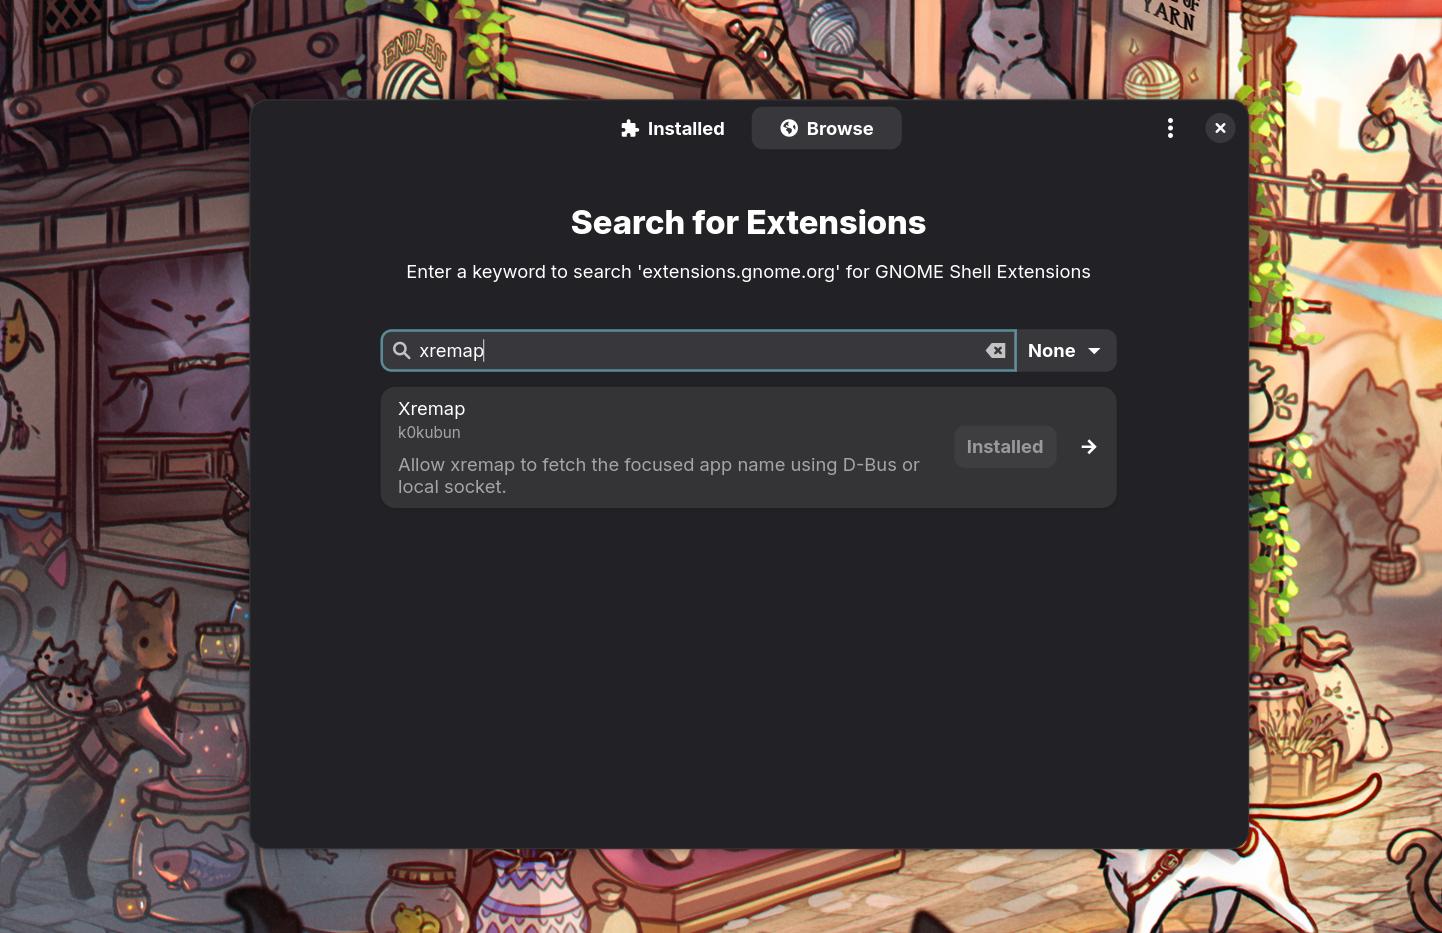
In order to install xremap, we need to first make sure we have rust and some other tools installed. You can try to do step 3 and if it fails come back here. If you are certain that you have everything you need already, you can proceed to step 3 anyway.
Warning
Below I list a number of terminal commands, including some which automatically run scripts. You should never enter terminal commands you find on the internet unless you understand what they do and are sure that it is not harmful.
Install rustup (the Rust installer):
curl --proto '=https' --tlsv1.2 -sSf https://sh.rustup.rs | shFollow the prompts. This installs rustc, cargo, and rustup.
Restart your shell or source the environment:
source $HOME/.cargo/envThis adds
$HOME/.cargo/binto your PATH.Verify the installation:
cargo --versionIf you see an output, you should be good to go.
Now we’re ready to proceed with the installation
Use cargo to install xremap:
cargo install xremap --features gnomeCreate the configuration file:
mkdir -p ~/.config/xremapAdd the configuration.
I use Neovim. For which we enter this command.
nvim ~/.config/xremap/config.ymlBut you can use Nano which comes preinstalled on every Linux distro. That would mean typing this command instead.
nano ~/.config/xremap/config.ymlYou can use any editor you like. These are just two options.
Enter this into the file and then save out.
virtual_modifiers:
  - CapsLock

keymap:
  - name: CapsLock + hjkl to Arrows
    remap:
      CapsLock-h: Left
      CapsLock-j: Down
      CapsLock-k: Up
      CapsLock-l: Right
      CapsLock-space: Super-space
Tip
On Neovim, you save by pressing the colon key and then w to save, q to quit. In other words, you hit escape to stop inputting text and type
:wq
Start xremap:
xremap ~/.config/xremap/config.ymlNow you should be able to use the feature, so long as you leave the terminal open and the command active. This is fine for testing, but it’s not the functionality we want.
Set up autostart
I do this by simply “opening” the non-existent file with Neovim.
nvim ~/.config/autostart/xremap.desktopEnter the following into the new file and save.
[Desktop Entry]
Type=Application
Name=xremap
Exec=/home/user/.cargo/bin/xremap /home/user/.config/xremap/config.yml
Comment=Remap Caps+hjkl to arrow keys
X-GNOME-Autostart-enabled=true
Note
Replace user with your username.
What did we learn?
Nothing is impossible on Linux. But it is sometimes more complicated than you might expect. Karabiner Elements has existed for Mac for a long time, and with it, I was able to configure a rather niche workflow in minutes. On Linux, I had to understand the nature of the problem itself and how it interrelated to my specific setup. I had to rule out certain distributions which would make it harder or even impossible to do this kind of customization. And of course, I had to get comfortable with using the terminal.
In the end though, it wasn’t very hard and it satisfied my compulsive need to tinker for another day. In the next post, I’ll tell you about other system tweaks and software choices I’ve made to make Linux feel more like home.
If you like this kind of content, don’t forget to like and share it on social media and if you’re comfortable with cryptocurrency, consider dropping a little tip with the buttons below to show that you value this kind of content. More about why I chose crypto over other tip options here.
I do really want to replace this little 1080p Thinkpad with a Framework 13 Pro at some point. That’s not something I can justify when I have limited funds and a perfectly working Macbook to daily drive, but it’s one of my plans for the money I receive as tips. Just putting that out there.
I hope you found this entertaining, interesting, helpful, or all of the above.
Here are some ways to support this content